
The Ultimate Guide to DIY Sealing Driveways and Walkways
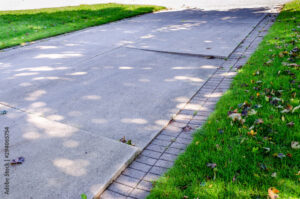
A well-maintained driveway or walkway doesn’t just add curb appeal to your home; it serves as a welcoming path to your personal sanctuary. However, the outdoor elements take a toll on these surfaces, resulting in cracks, fading, and wear over time. Sealing your asphalt or concrete surfaces not only rejuvenates their appearance but also significantly extends their lifespan — with a bonus of that freshly sealed look!
In this comprehensive guide, tailored for homeowners and DIY enthusiasts, we’ll walk you through everything you need to know about sealing your driveways and walkways. We’ll cover the benefits of sealing, take you step by step through the DIY process, and provide expert tips to ensure a professional-grade finish. Prepare to transform your outdoor spaces and protect your investments for years to come.
Why Seal Your Driveway and Walkway?
First things first, why should you bother sealing your asphalt or concrete surfaces? The effort and cost involved can seem daunting, but the reasons are clear.
Enhance Aesthetic Appeal
A faded, cracked driveway can undermine even the most beautiful home. A fresh seal coat can turn back the clock, giving an instant aesthetic lift and making your property look meticulously maintained.
Extend Surface Life
Sealing your driveway and walkways acts as a protective layer against water, UV rays, chemicals, and general wear and tear. This can double the life of these surfaces compared to unsealed ones.
 Prevent Further Damage
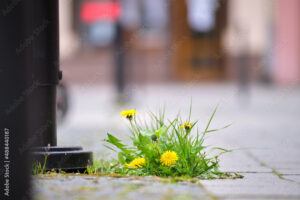
Cracks and fissures in driveways and walkways are entry points for water. Sealing these helps to prevent water penetration, freeze-thaw damage in colder climates, and weed growth through pavement cracks.
Save on Repair Costs
Maintaining your outdoor surfaces with regular sealing can drastically reduce the need for costly repairs or resurfacing, saving you money in the long run.
Essential Tools and Materials
Before you begin, gather the following supplies. Investing in quality tools and materials ensures a better outcome.
Tools
- Stiff-bristled broom
- Pressure washer
- Paintbrush or squeegee
- Leaf blower
- Crack filler or patching compound
- Gloves
- Safety glasses
- Mask
Materials
- Sealer
- Primer
- TSP cleaner
- Duct tape
- Marker
- Paint stir stick
- Safety cones or caution tape
Choosing the Right Sealer
Not all sealers are created equal. There are several options to consider:
Coal Tar Sealers
- Pros: Longest-lasting, excellent resistance to oil and gasoline.
- Cons: High VOC content, longer cure time.
Asphalt Emulsion Sealers
- Pros: Environmentally friendly, low VOC content.
- Cons: Typically lasts half as long as coal tar, less resistant to oil and gasoline.
Acrylic Sealers
- Pros: Dries faster, enhances surface appearance.
- Cons: May require more frequent reapplication, less resistant to harsh chemicals.
Penetrating Sealers
- Pros: Best for preventing water damage, does not change the surface texture or appearance.
- Cons: Does not protect against UV rays or harsh chemicals.
Each sealer has its place, so choose based on your specific needs, climate, and surface type.
Follow and subscribe to our YouTube channel for tons of Great information.
Website constructionconsumeradvocacyinstitute.com
Podcast anchor.fm/galloway
www.youtube.com/@ConstructionConsumerAdvocacy
Preparing Your Driveway
Proper preparation is key to a successful seal. Follow these steps:
Step 1: Clean the Surface
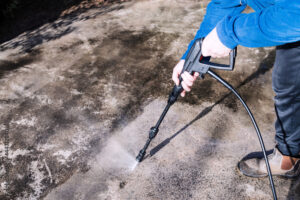
Sweep the area to remove debris, then use a pressure washer to blast away dirt, moss, and loose material. For oil stains, use a degreaser.
Step 2: Fill in the Cracks.
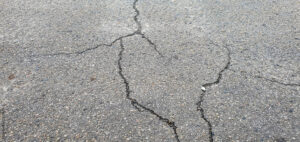
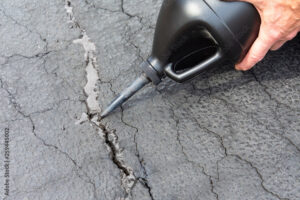
Apply a crack filler or patching compound to any visible cracks. Smooth the filler with a putty knife or trowel and allow it to dry.
Step 3: Repair Potholes
For deeper holes, use a cold patch or hot asphalt mix. Compact the material with a tamper or drive over it with a car.
Step 4: Protect Adjacent Surfaces
To avoid sealer staining, use duct tape and plastic to cover any edges or siding that border your driveway.
Sealing Your Driveway
With the surface prepped, it’s time to apply the sealer. Here’s how:
Step 1: Plan the Application
Make sure you have enough sealer for the entire surface. Measure the area and calculate the amount of sealer needed based on the manufacturer’s coverage guidelines.
Step 2: Begin with Edges
Start by cutting in along the edges with a paintbrush or squeegee. Apply the sealer thinly to avoid excess buildup, which can lead to peeling.
Step 3: Apply the Main Surface
Work in sections, applying the sealer with a squeegee or long-handled tool in a back-and-forth motion. Overlap each pass slightly to ensure even coverage.
Step 4: Apply a Second Coat
For best results, apply a second coat using the opposite direction from the first. Ensure that the first coat is completely dry before applying the second.
Step 5: Allow to Cure
Depending on the type of sealer, cure times will vary. Keep vehicles and foot traffic off the sealed surface until completely dry.
Advanced Tips for Sealing Success
For those looking to take their sealing game to the next level, consider these expert tips:
Tip 1: Work in the Right Conditions
Seal on a day with mild temperatures and low wind to avoid rapid drying, which can cause a hazy finish or uneven coverage.
Tip 2: Mix the Sealer Thoroughly
Sealers can separate in the container. Use a paint stirrer to mix the product until it is uniform in consistency before applying.
Tip 3: Seal Regularly
Don’t wait until your driveway looks worse for wear. Regular sealing every 2-4 years is the best preventative maintenance.
Safety Considerations
When working on your driveway, safety should be your top priority:
- Always wear appropriate safety gear, including gloves, safety glasses, and a mask.
- Be cautious with pressure washers and other tools. Follow manufacturer recommendations for safe operation.
- Allow adequate ventilation when working with sealers, especially those with high VOC content.
Post-Sealing Care
You’ve put in the effort, and now it’s time to protect the newly sealed surface:
- For the first few days, avoid sharp turns or sudden braking on the sealed area.
- Regularly sweep the surface to keep it free of debris and dirt.
- Address any spills or stains promptly to prevent them from setting into the sealer.
Assessing the Success of Your DIY Sealing
To assess if your seal job was successful, look for:
- A uniform and even finish without areas of heavy application or missed spots.
- A surface that repels water as opposed to soaking it up.
- A driveway that remains durable and resists the elements over time.
If you notice any issues, jot them down for the next time you need to reseal or consult a professional for advice.
Conclusion
Sealing your driveway and walkways is a rewarding DIY project that offers both immediate and long-term benefits. By following the steps in this guide and arming yourself with the right tools and materials, you can rejuvenate your outdoor spaces and protect your investments. Remember, preparation is the key to a durable and professional-looking finish. Whether you’re looking to enhance your home’s aesthetic appeal or safeguard against the elements, a sealed driveway is a testament to the care and effort you put into your property. Happy sealing!
Follow and subscribe to our YouTube channel for tons of Great information.
Website constructionconsumeradvocacyinstitute.com
Podcast anchor.fm/galloway