
Unbreakable Bonds Below Ground: The DIY Magic of Carbon Fiber for Basement Crack Repair
When it comes to the unseen but profoundly felt perils of home ownership, the phrase “a crack in the foundation” carries an almost mythical weight. It’s spoken with an air of impending doom, the idea that the very thing your home is built upon is under threat. But in our modern age, we’ve discovered materials that can stand toe-to-toe with even the most daunting of structural issues. One such material, known for its strength and versatility, is carbon fiber.
In this in-depth guide, we’re going to explore the fascinating world of DIY carbon fiber applications for basement crack repair. We’ll unpack the advantages of carbon fiber, break down the installation process step by step, and provide pointers for when to tackle this as a weekend warrior and when to call in professional reinforcements. Whether you’re a DIY enthusiast looking to save some money on home repairs or a homeowner keen to protect your investment, read on to discover how carbon fiber is redefining the strength of our homes from the inside out.
 The Stellar Strength of Carbon Fiber
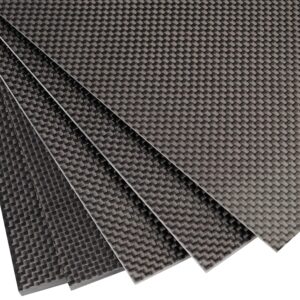
Carbon fiber is a material that resonates with our era—a symbol of cutting-edge technology and high performance. But what is it about this composite that makes it such a standout in the realm of basement crack repair?
Advantages Over Traditional Methods
When compared to traditional methods like epoxy injection, carbon fiber shines in several key areas. For starters, it’s incredibly strong—up to ten times as much as steel while being much lighter. This strength is accompanied by flexibility, making the material ideal for withstanding the expansion and contraction that occurs in foundation cracks. It’s also non-invasive, quick to install, and promises a more aesthetically pleasing result, which is a boon for any homeowner concerned about the look of their interior walls.
 Crafting a Custom Solution
An often-underappreciated benefit of carbon fiber is its ability to be tailored to fit the specific needs of any given repair. Each strip can be constructed to the exact dimensions required, making it an ideal candidate for repairs in cramped basement corners or around awkwardly placed utilities. This customization ensures that homeowners can get a professional-grade repair that’s been installed with their unique situation in mind.


Earthquake and Age Resistance
In regions prone to seismic activity, as well as for those homes entering their golden years, carbon fiber can provide a layer of structural resilience like no other. The composite’s innate resistance to rust and decay also means your repair is more likely to outlive even the service life of your home, providing peace of mind for decades to come.
Follow and subscribe to our YouTube channel for tons of Great information.
Website constructionconsumeradvocacyinstitute.com
Podcast anchor.fm/galloway
www.youtube.com/@ConstructionConsumerAdvocacy
 Unveiling the DIY Process
The beauty of carbon fiber is not just in its strength but also in its accessibility. With the right tools, materials, and a steady hand, any homeowner can partake in this repair process. Here’s a comprehensive breakdown of how to repair basement cracks with carbon fiber, straight from the pros.
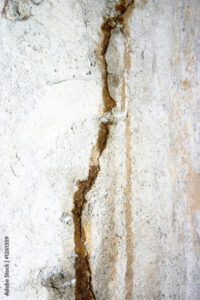
Step 1: Preparation is Paramount
Before you can start adding layers of carbon fiber, the surface of your basement wall needs to be scrupulously clean. Begin by removing any loose material from the crack, using a wire brush to clear away debris. For optimal adhesion, you’ll also want to give the surface a good clean with a solvent or alcohol to remove any traces of oil, dust, or moisture.
Step 2: Installing the Crack Injection Ports 
To ensure your epoxy will reach the deepest parts of the crack, you’ll need to install crack injection ports. These are small plastic tubes that allow you to apply epoxy at varying depths. Begin by applying a bead of epoxy along the crack, then press the ports in place at regular intervals, roughly an inch apart.
Step 3: Seal It Up
Once your ports are in, apply more epoxy over the surface of the wall, completely sealing the crack. Now, give it time to cure—usually a day will suffice, but refer to the manufacturer’s instructions for a precise timeline.
Step 4: Apply the First Layer of Carbon Fiber  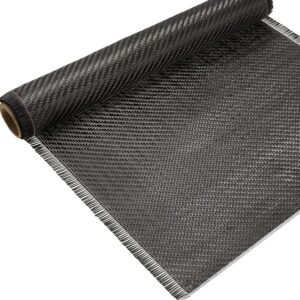
Once the epoxy is set, it’s time to apply your first layer of carbon fiber. Measure the length of strip you need, then mix up your epoxy and apply a thin layer over the wall. Press the carbon fiber strip into the epoxy and smooth it out to remove any air bubbles or wrinkles. This first layer will add strength and stability to the repair.
Step 5: Build It Up
Add successive layers of carbon fiber, alternating the direction of the weave with each layer to maximize coverage. For most repairs, two to three layers of carbon fiber will suffice, but be sure to refer to the manufacturer’s recommendations for your specific materials.
Step 6: The Finishing Touch 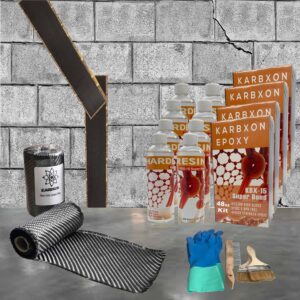
Once your final layer is in place, apply a sealing coat of epoxy over the entire repair. This will not only lock the carbon fiber in place but also create a smooth surface that blends with the surrounding wall. This last step is vital for ensuring the carbon fiber won’t snag on anything and maintains its protective alignment.
Follow and subscribe to our YouTube channel for tons of Great information.
| www.youtube.com/@GallowayBuildingServices |
When to DIY and When to Call a Pro
The allure of a DIY approach is understandable, but there are instances when the complexity or severity of the repair makes it wiser to seek professional assistance.
Complexity of Cracks
Not all cracks are created equal. While narrow, vertical cracks are often well-suited to a DIY carbon fiber repair, wider or angling cracks may be indicative of more severe foundational issues that a homeowner simply isn’t equipped to handle.
Under Pressure
If water pressure is present at the site of the crack or if the foundation is at risk of further movement, it’s best to bring in a pro. These factors not only complicate the repair process but can also indicate more severe problems that may require a different approach.
Peace of Mind
For some homeowners, the peace of mind that comes with a professional repair is well worth the cost. With a pro, you’re not only getting their expertise but also a warranty on the work, a guarantee that the repair was done right.
DIY Carbon Fiber Kit Selection
Selecting the right carbon fiber kit is paramount to the success of your repair. Here are the key features to consider when making your purchase.
The Material Itself
Ensure the kit you choose includes high-quality carbon fiber that meets industry standards. Cheaper kits may skimp on fiber quality, leading to a weaker and less durable repair.
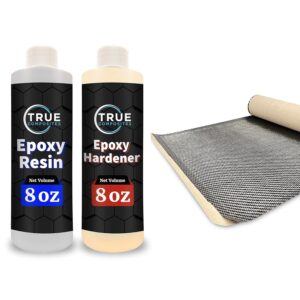
Epoxy
The epoxy is as crucial as the carbon fiber itself. Look for a high-strength, low-viscosity epoxy designed specifically for this kind of application. It should also boast good adhesion to concrete and steel, ensuring a secure bond to your foundation.
Additional Tools and Supplies
Beyond the carbon fiber and epoxy, ensure your kit includes gloves, a mixing wand, and any other necessary tools. Some kits may also include a solvent or alcohol for surface preparation, which can be a time-saver.
Wrapping Up
Carbon fiber has found its way into countless facets of our modern lives, from aerospace to high-end bicycles, and now, to the very foundations of our homes. Its arrival on the DIY scene is a testament to its strength and ease of use, and for homeowners facing the specter of structural repair, it’s nothing short of revolutionary.
With proper preparation, the right materials, and an understanding of the task at hand, a carbon fiber repair is within the reach of any diligent homeowner. And for those instances where the situation demands it, there’s no shame in bringing in a pro. In the end, the strength and stability of your home’s foundation are too important to leave to chance. But for those times when a DIY carbon fiber repair is the right call, you’ll be equipped with the knowledge to fortify your home with a material that’s truly unbreakable.
Follow and subscribe to our YouTube channel for tons of Great information.
Websiteconstructionconsumeradvocacyinstitute.com
Podcastanchor.fm/galloway