
Are you tired of high energy bills and drafty rooms? It’s time to take a closer look at your windows. Properly insulating, sealing, and caulking around your windows can make a significant difference in your home’s comfort and energy efficiency. This blog will guide you on why it’s important and how you can do it yourself.
Why Insulate, Seal, and Caulk Your Windows?
1. Energy Efficiency 
One of the primary reasons to insulate, seal, and caulk around your windows is energy efficiency. Poorly sealed windows can allow cold air to seep into your home during winter and hot air during summer. This means your heating and cooling systems have to work harder to maintain a comfortable temperature, leading to higher energy bills.
2. Improved Comfort
Drafty windows can create uncomfortable cold spots in your home. By properly sealing and insulating your windows, you can keep your home’s temperature consistent and comfortable throughout the year.
3. Moisture Control 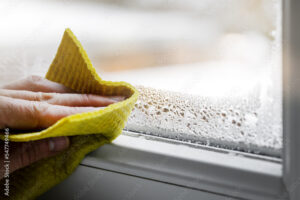
Gaps and cracks around windows can allow moisture to enter your home, leading to mold and mildew growth. Proper sealing helps to keep moisture out, protecting your home’s structure and improving indoor air quality.
4. Noise Reduction
Sealing your windows can also help reduce noise from outside. This is particularly beneficial if you live in a noisy neighborhood or near a busy street.
5. Increased Home Value
Energy-efficient homes are more attractive to potential buyers. By improving your home’s insulation and sealing, you can increase its value and make it more appealing on the market.
How to Insulate, Seal, and Caulk Your Windows
Step 1: Gather Your Materials
Before you start, gather all the necessary materials. You will need:
- Caulk and a caulking gun
- Weatherstripping
- Insulating foam sealant
Inspect your windows for any gaps, cracks, or areas where air might be leaking. Pay special atten to t
- Utility knife
- Putty knife
- Rags for cleaning
- Gloves and safety glasses
Step 2: Inspect Your Windows 
Inspect your windows for any gaps, cracks, or areas where air might be leaking. Pay special attention to the areas where the window frame meets the wall.
Step 3: Clean the Area
Clean the areas around your windows where you will be applying caulk or weatherstripping. Remove any old caulk or paint using a putty knife or utility knife.
Step 4: Apply Weatherstripping

Apply weatherstripping to the movable parts of the window to create a tight seal when the window is closed. There are various types of weatherstripping available, including adhesive-backed foam tape, v-strip, and felt.
Step 5: Caulk Around the Window Frame 
Load your caulking gun with the caulk and apply a continuous bead along the edges of the window frame where it meets the wall. Smooth the caulk with a damp finger or a putty knife to ensure a tight seal. Allow the caulk to dry according to the manufacturer’s instructions.
Step 6: Insulate Larger Gaps
For larger gaps around the window frame, use insulating foam sealant. Apply the foam sealant into the gaps, allowing it to expand and fill the space. Once it’s dry, trim any excess foam with a utility knife.
Step 7: Final Inspection 
After everything has dried, do a final inspection to ensure there are no remaining gaps or cracks. Make any necessary touch-ups with additional caulk or weatherstripping.
For Tons of Great Free Information please hit “Like & Subscribe”
Websiteconstructionconsumeradvocacyinstitute.com
Podcastanchor.fm/galloway
www.youtube.com/@ConstructionConsumerAdvocacy
Conclusion
Insulating, sealing, and caulking around your windows is a simple yet effective way to improve your home’s energy efficiency, comfort, and value. Whether you’re a homeowner, DIY enthusiast, or energy saver, taking the time to properly seal your windows can lead to significant benefits.
Ready to get started? Follow these steps and enjoy a more comfortable, energy-efficient home. If you need further assistance, don’t hesitate to reach out to a professional for help.